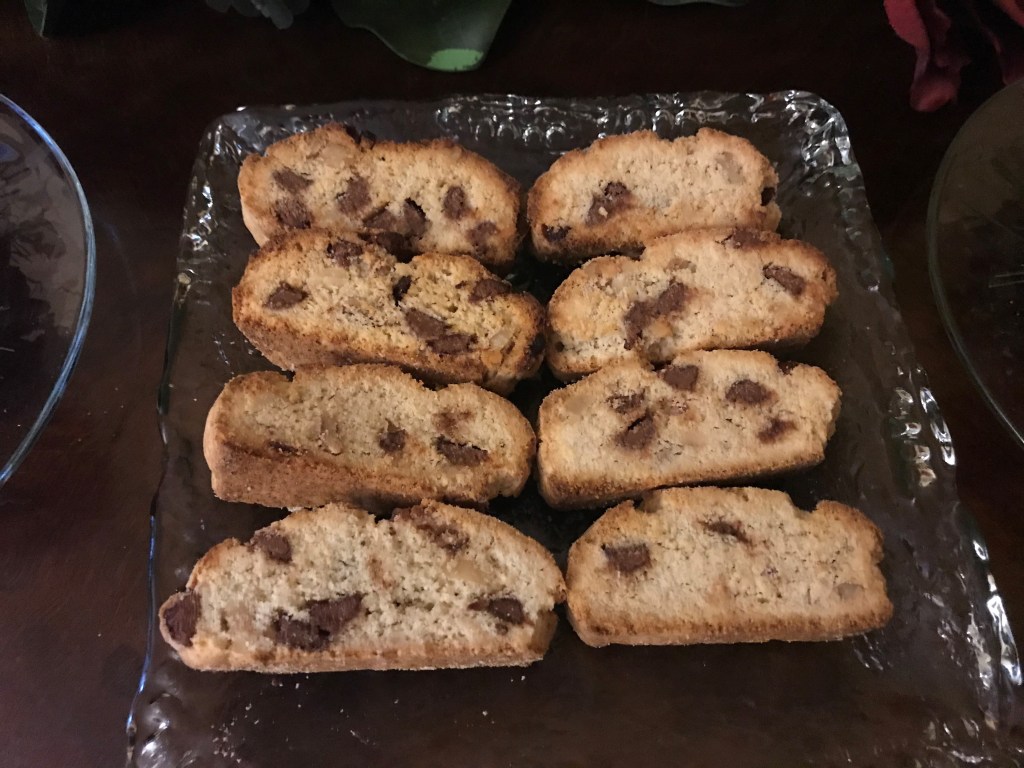
This one is made with Walnuts and Chocolate Chips. A favourite for both young and old!
I haven’t posted any recipes for a few weeks. It feels like I’m caught in the “in-between” regular baking season and the Christmas season which is five weeks away! I started baking Biscotti a few years ago and was delighted at the simple recipes available online which bake up beautifully! I have placed them in apothecary jars and Mason jars, tied up festively with ribbons and bows to give to colleagues and clients. This presentation shows that I put time and effort in to give them a sweet treat which keeps for several weeks during the holidays. I usually set a container aside and pull out some Biscotti to accompany Christmas cookies or other baked goods. Good to keep on hand for any unexpected company.
Here is the simplest recipe that will become your “go-to” recipe this Holiday Season!
Ingredients:
1/2 cup Vegetable Oil
1 cup Sugar
3 large Eggs
2 3/4 cups All-Purpose Flour
3/4 Walnut pieces (I usually break them down even more than what is in the package to create smaller pieces)
1 tablespoon Baking Powder
3/4 teaspoon Almond Extract
3/4 cup Milk Chocolate Chips
Preheat your oven to 375F
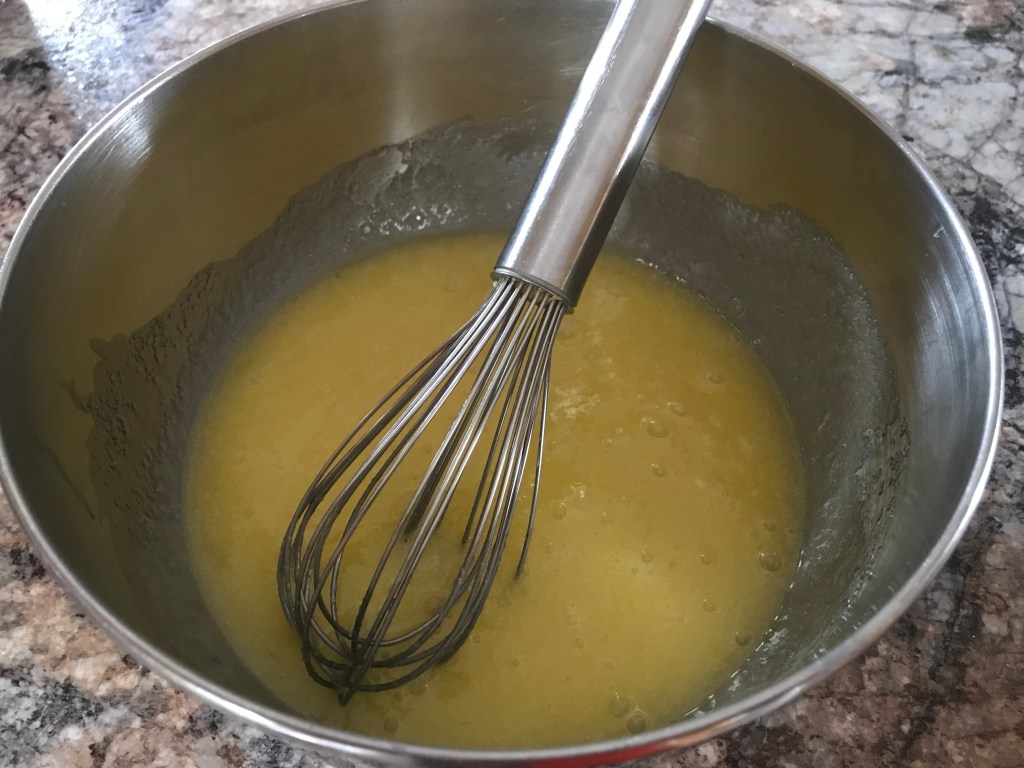
In a medium bowl, whisk oil, sugar, eggs and almond extract by hand for about one minute.
Combine the flour and baking powder and add to the mixture, using a rubber spatula to fold in and scrape the sides.
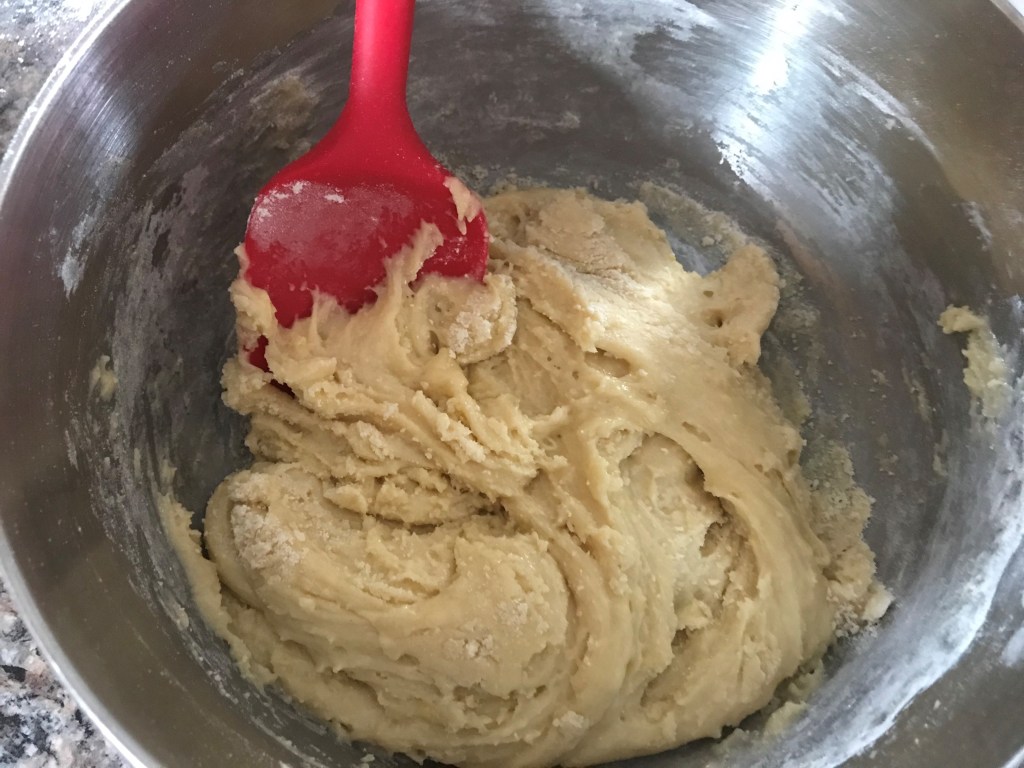
Once you have a fairly thick dough, add your walnuts and chocolate chips, gently folding in again with a rubber spatula. This will only take a few seconds to mix in. Don’t overmix as the dough is quite heavy to work with by hand.
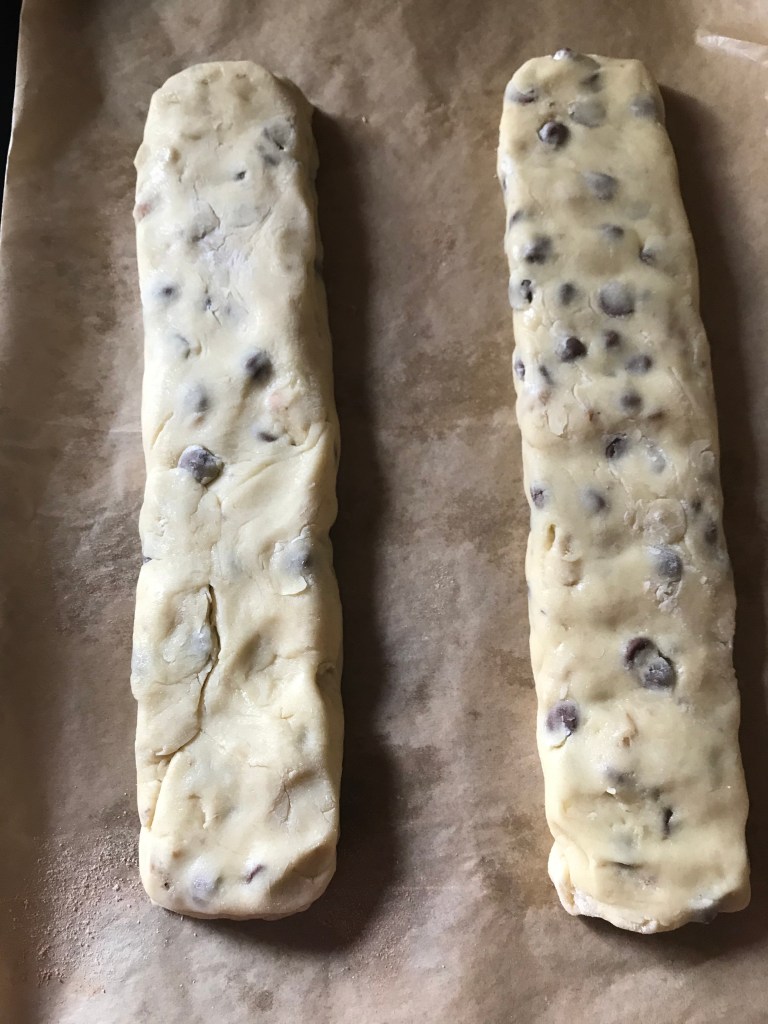
Cover a baking sheet with parchment paper. Sprinkle a little flour on your hands and the top of the dough. Take about half of the dough and shape it into a log on the baking sheet. Add more flour on your hands and take the rest to do the same. I make smaller biscotti so that they are daintier to serve. You can use all of the dough to make one large, long log. But this baking time is for two logs.
Bake for 25 minutes, until the tops are a nice golden brown. You may need to keep them in for a few more minutes, but 25 should do it.
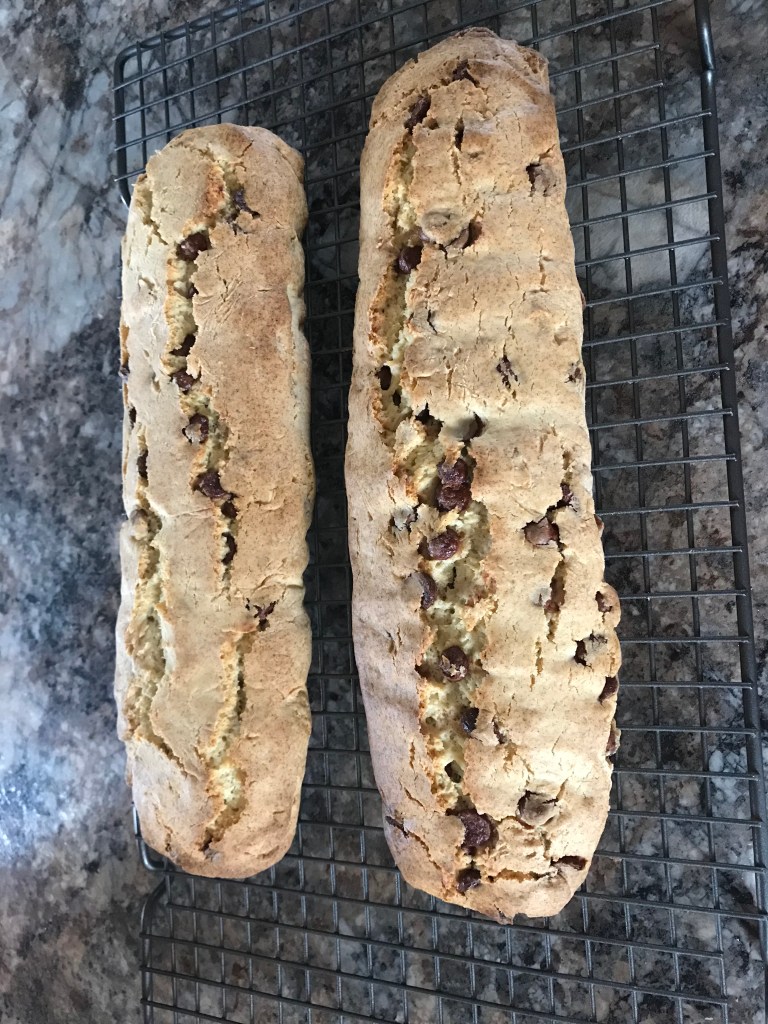
You’ll see that even though the logs I shaped prior to baking were quite similar in size, the one baked up much larger. But no worries, I’m a self-taught baker. These things don’t always turn out perfectly. When you cut them, this difference won’t be noticable at all! It’s the taste that counts!
Take the logs out of the oven and place on a cooling rack. I usually wait until they are fairly cool before cutting them. This can be half an hour or an hour later.
Heat your oven back up to 375F.
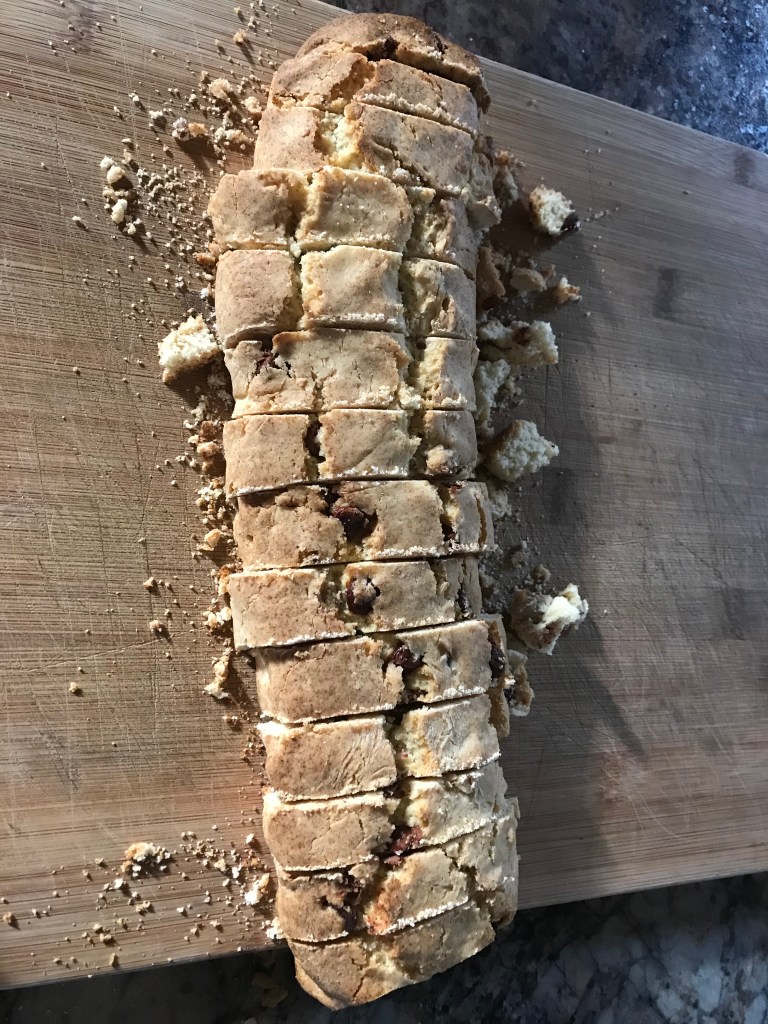
On a cutting board, slice your logs fairly evenly and place down on the baking sheet. Pop back into preheated oven for 6-8 minutes. The tops should be a nice golden colour like toast. The bottoms will brown automatically, so you don’t have to flip them.

Let them cool thoroughly before storing them in an airtight container. They last for several weeks!
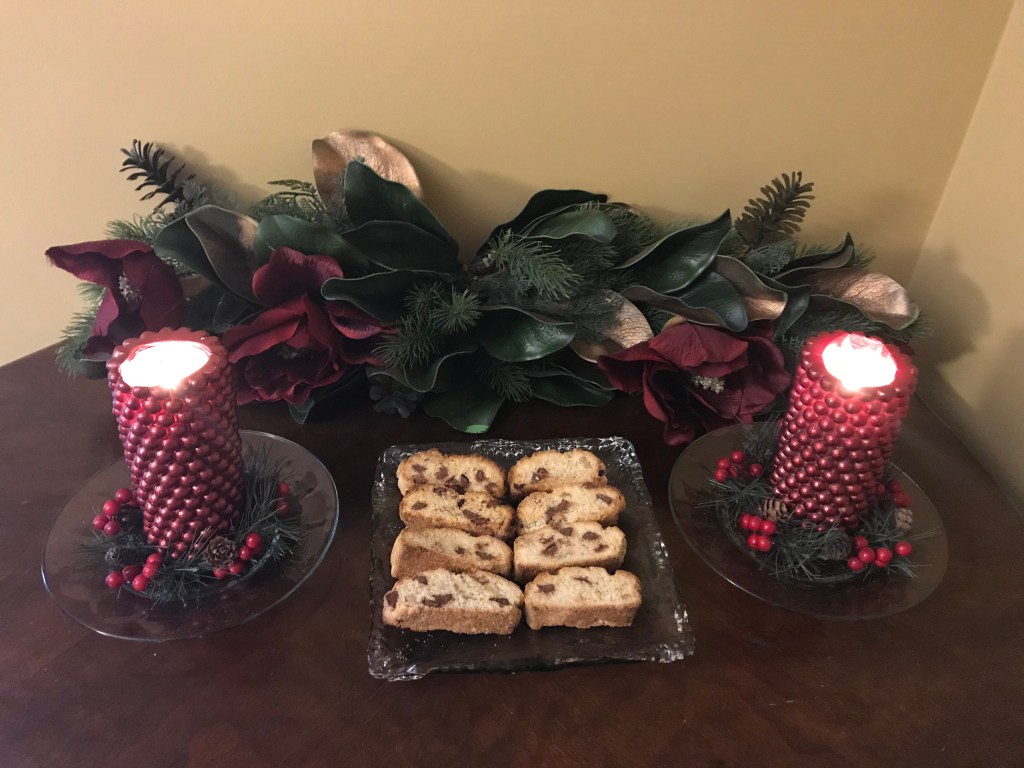
As always, enjoy! Lolita
